
How to send custom messages to JIRA users with Script Runner Cloud
von Christian Kienzl

Welcome to our first post at AmberTech Solutions. We are convinced that both your and our time is valuable. In view of this, we will dispense with a long introduction on our part and get straight to the point of this news.
Precondition:
You have JIRA Cloud access and have activated the ScriptRunner app.
Target:
The aim of this article is to create an additional notification option for your JIRA users in JIRA Cloud with the ScriptRunner app. The basis for this is an example from ScriptRunner. All images and the code shown were created on our development instance and are productive.
Targetgroup:
The target group of this article are users who have never worked with the Script Runner tools in JIRA Cloud, or who have worked very little with them.
Limitations:
This type of notification can only be used to inform users who exist in the JIRA system. Sending to e-mail addresses that do not exist as users is NOT possible! -In our next post, we will show you how to do this!
Of course we offer you, in a direct conversation, a deeper insight into the world of ScriptRunner and the associated possibilities in JIRA Cloud!
Create a new issue

To test the function of the listener we are going to create, we create a ticket in our JIRA project.
Open the ScriptRunner App
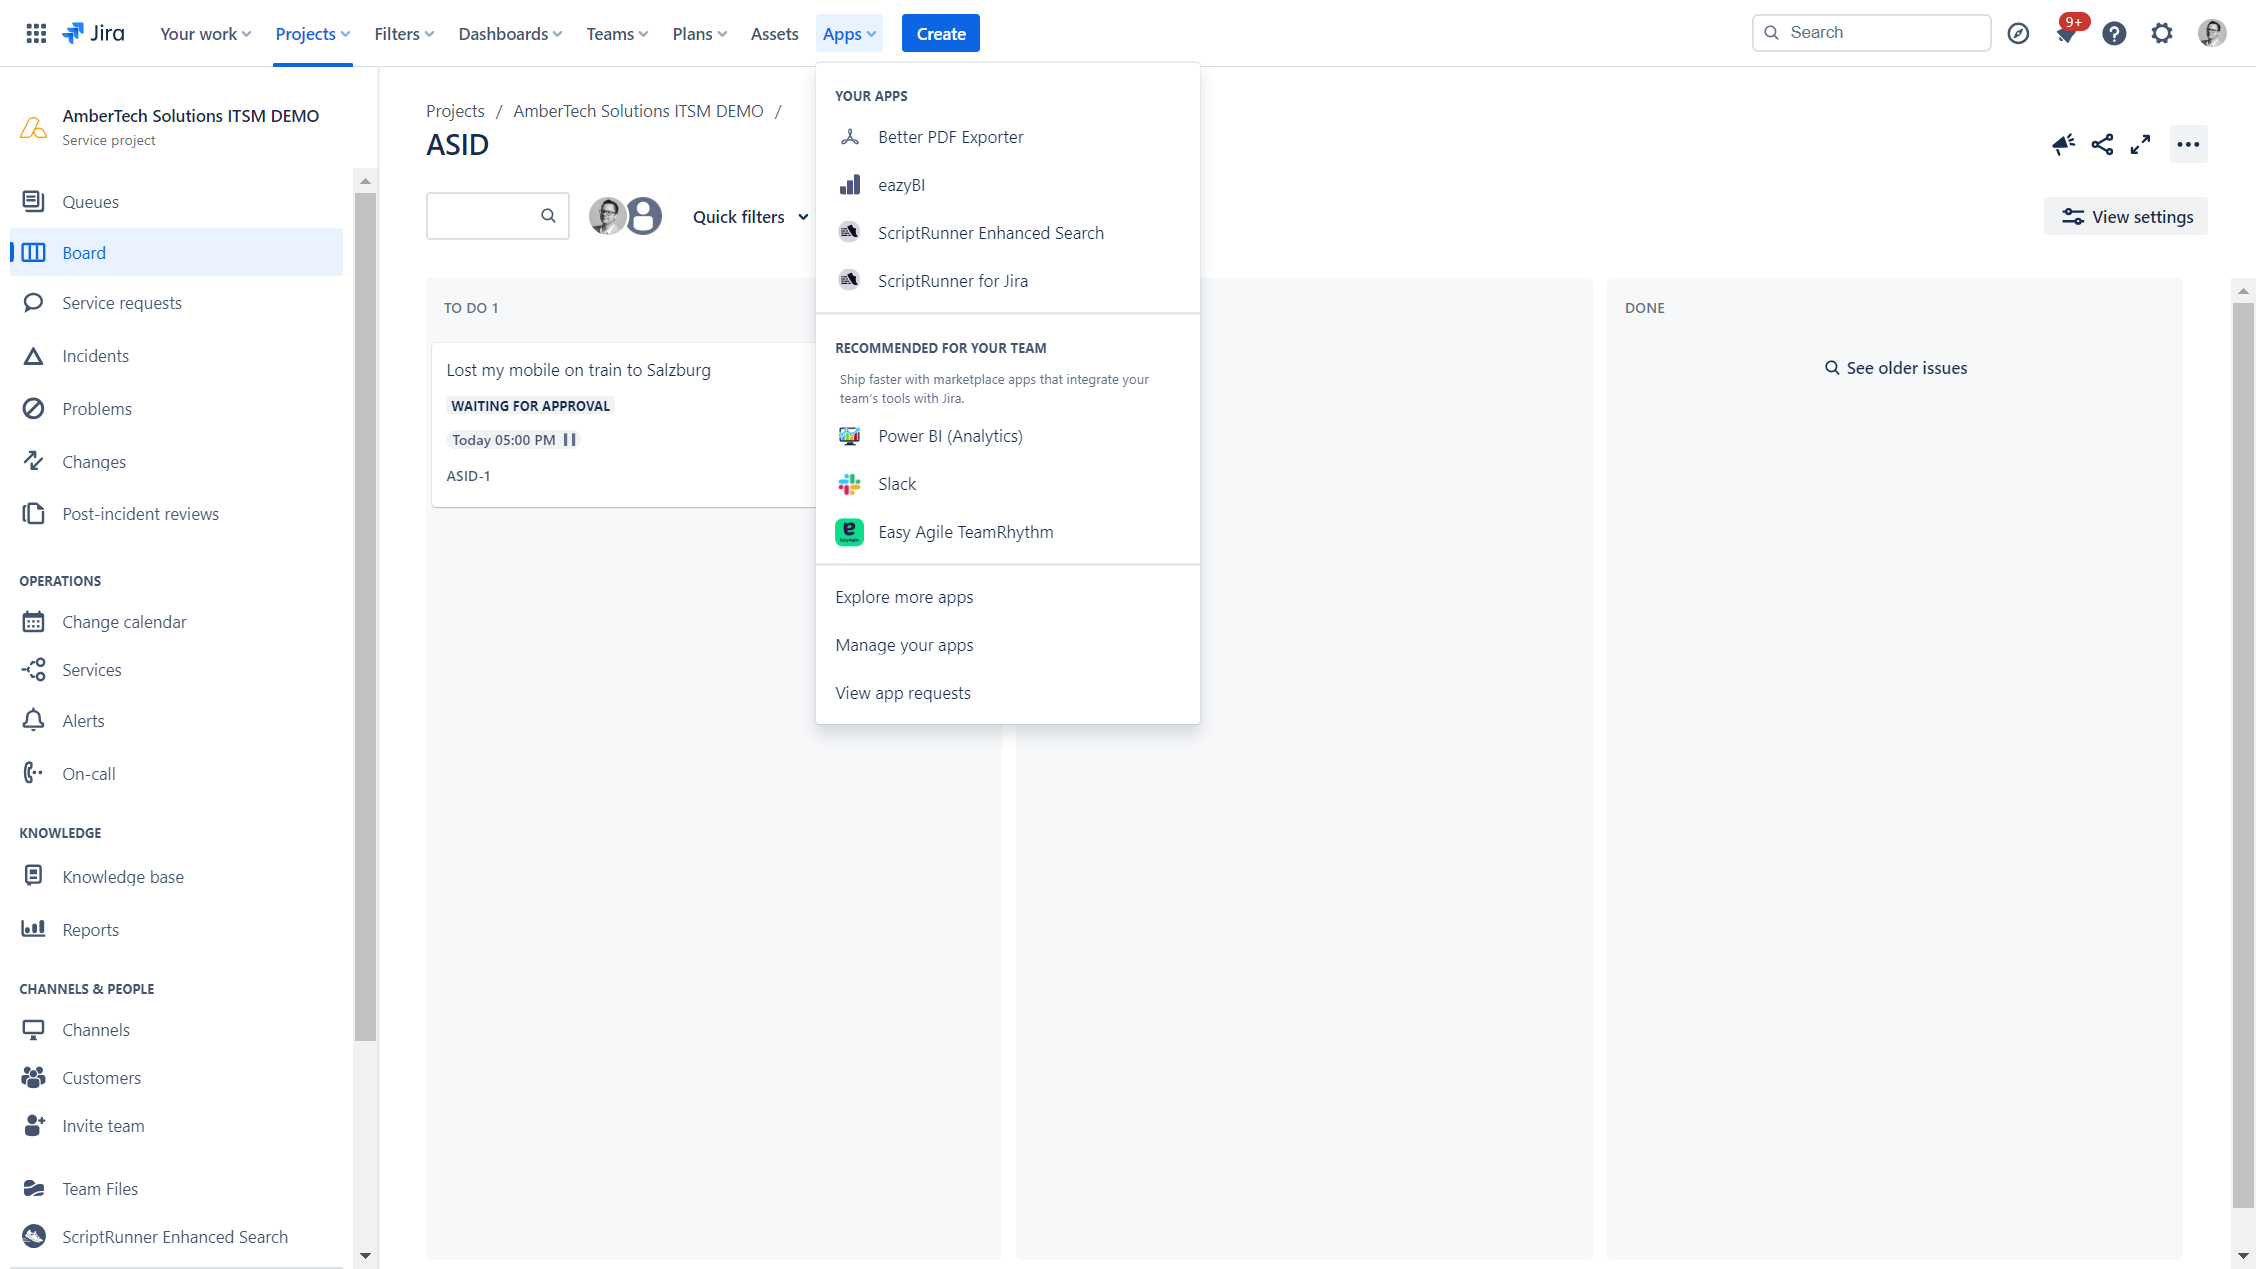
The ScriptRunner app can be found in the menu bar under Apps -> ScriptRunner for JIRA. The start page of the app will then open. Please close it with the X at the top right. Some ready-made functions are offered on the following page. These are not important for us at the moment. Please select Script Listener in the left bar or in the upper menu bar.
A script listener is an element that is triggered by certain actions such as something, the creation of a process or its update.
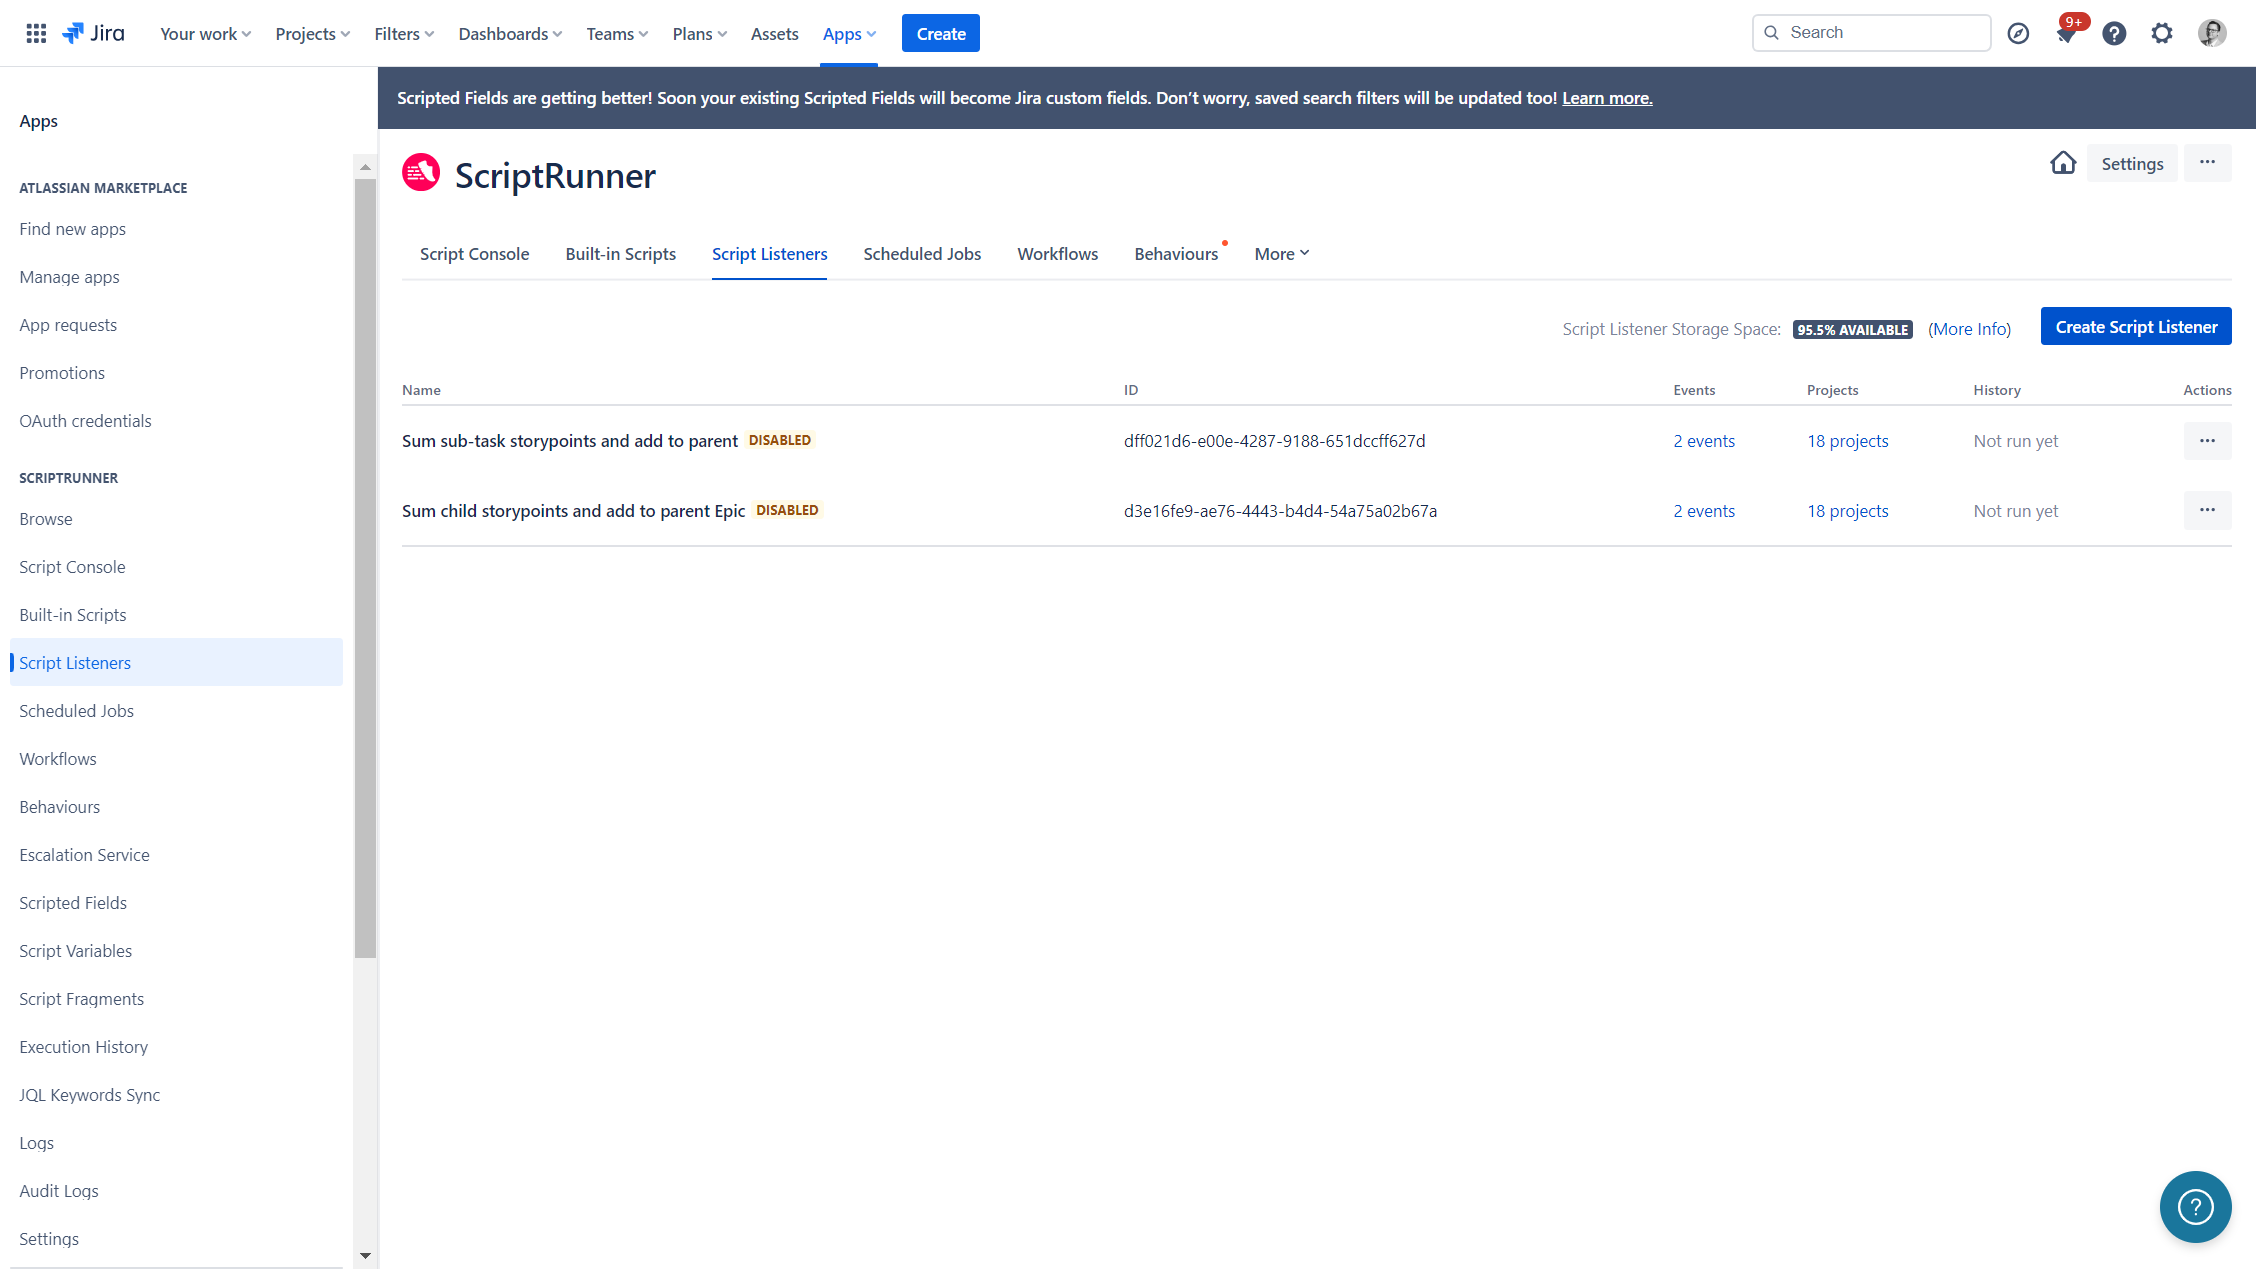
We create a new listener with the Create Script Listener button.


We create a new listener with the Create Script Listener button.
Create a ScriptRunner listener
When creating listeners, workflows or other elements in JIRA, it has proven useful to enter the key of a JIRA project (the prefix of the tasks) as a prefix. This quickly makes it clear which JIRA project this listener applies to. This is important when it comes to deleting projects and helps with troubleshooting.
In our case, the project key is ASID.
The description of the listener should be concise but meaningful. In our example (ASID) new mobile device request - send notification on status changed to waiting for customer. The field On these events defines the actions for which the listener is triggered. In our case, we select Issue Updated. The In these projects field restricts the listener to the selected project(s). In our case, this listener should only be triggered for our Service Desk project. The As this user field defines who performs this action. This can be the user who executes this action, but also a generic ScriptRunner user.
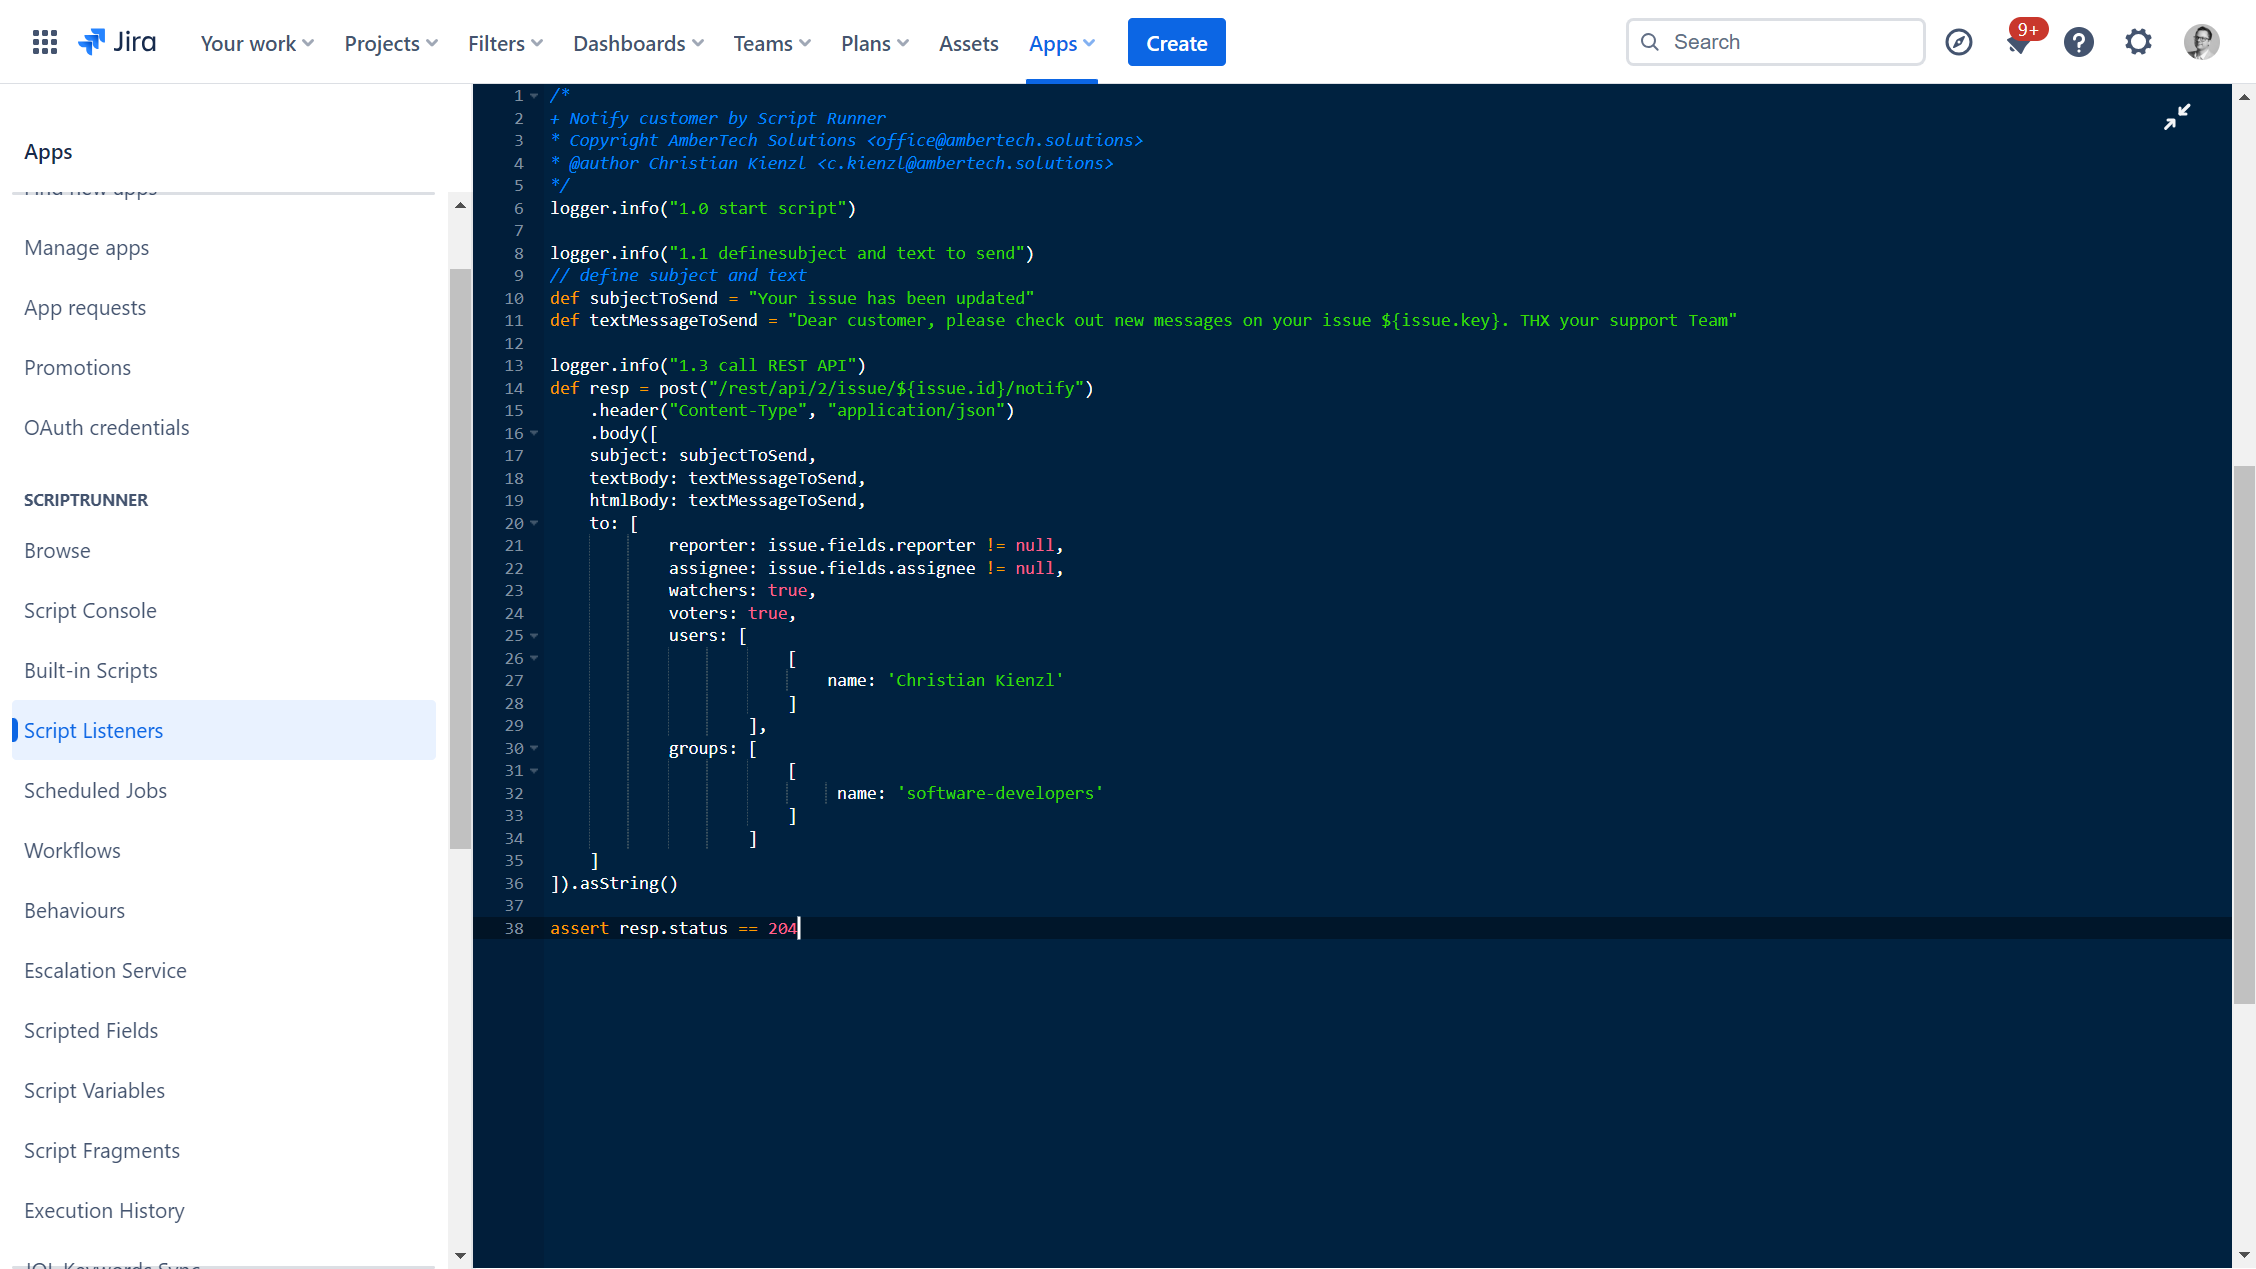
The code we want to execute is now entered in the code to run input mask.

Insert the ScriptRunner code
The code attached here is only a sample code and can be modified and supplemented as required.
/*
+ Notify customer by Script Runner
* Copyright AmberTech Solutions <office@ambertech.solutions>
* @author Christian Kienzl <c.kienzl@ambertech.solutions>
*/
logger.info("1.0 start script")
logger.info("1.1 definesubject and text to send")
// define subject and text
def subjectToSend = "Your issue has been updated"
def textMessageToSend = "Dear customer, please check out new messages on your issue ${issue.key}. THX your support Team"
logger.info("1.3 call REST API")
def resp = post("/rest/api/3/issue/${issue.key}/notify")
    .header("Content-Type", "application/json")
    .body([
        subject: subjectToSend,
        textBody: textMessageToSend,
        htmlBody: textMessageToSend,
        to: [
                reporter: issue.fields.reporter != null,
                assignee: issue.fields.assignee != null,
                watchers: false,
                voters: false,
                groups: [
                            [
                                 name: 'software-developers'
                            ]
                        ]
            ]
    ]).asString()
assert resp.status == 204
What does this code do?
the variable subjectToSend contains the subject of the message being sent. The variable textMessageToSend contains the sent text. A distinction can be made between a text and an HTML e-mail. In our case, we are sending a text without HTML.
The recipients are defined in the to area. In this example, a message is sent to the reporter if this is assigned; the same applies to the person who is assigned as an editor. It is also possible to send a notification to the watchers and those who have voted for this task. In both cases, we have entered the variable false, which means that nobody is notified. If the variable is changed to true, the people are notified. We have also added the group software-developers to the notified persons. This group must first be created in the system and filled with users.
We confirm the entry with the Save button at the bottom right and the listener is ready.
Test the Script
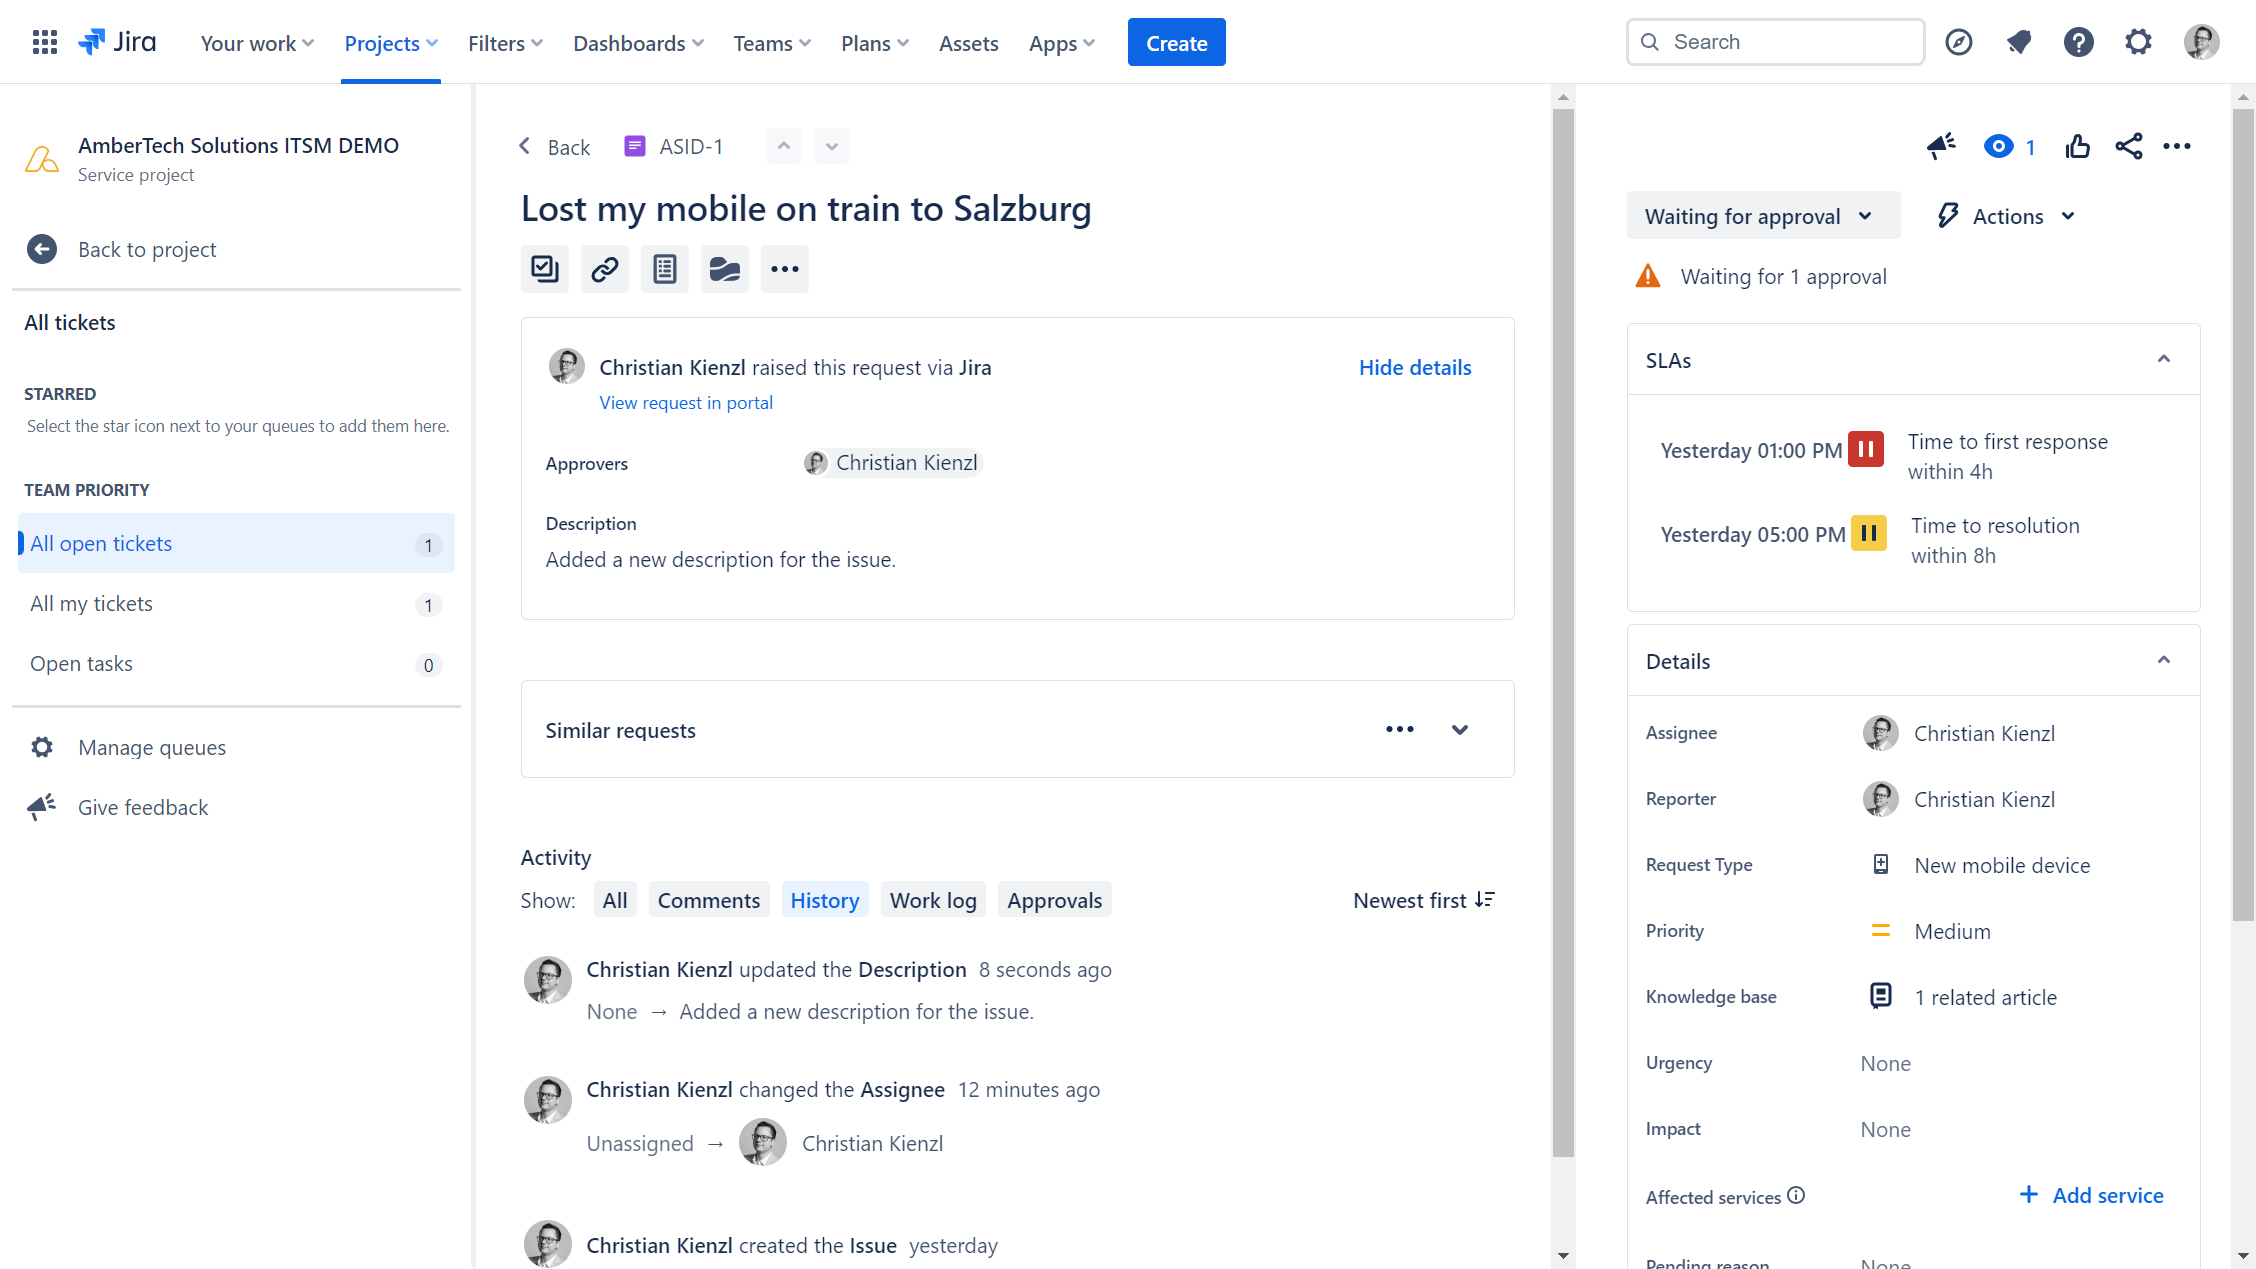
To test the script, we only need to make one change to the process we created at the beginning. The listener is triggered and the messages are sent .